
1. SSL FOR FREE를 사용하여 무료 SSL 인증서 발급
1) SSL FOR FREE 사이트 접속
SSL For Free - Free SSL Certificates in Minutes
2) 도메인 주소를 입력한 후 [Create Free SSL Certificate] 클릭

3) 계정 생성 또는 기존 계정으로 로그인

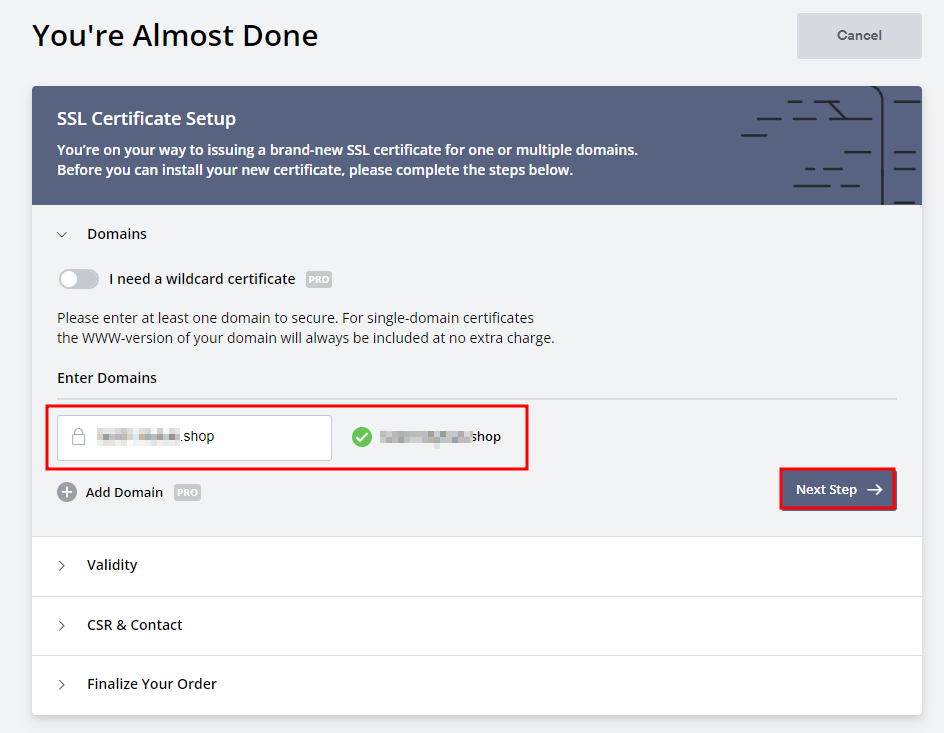
4) 도메인 이름 확인 후 [Next Step] 클릭
- 단일 인증서만 무료 발급이 가능하다.
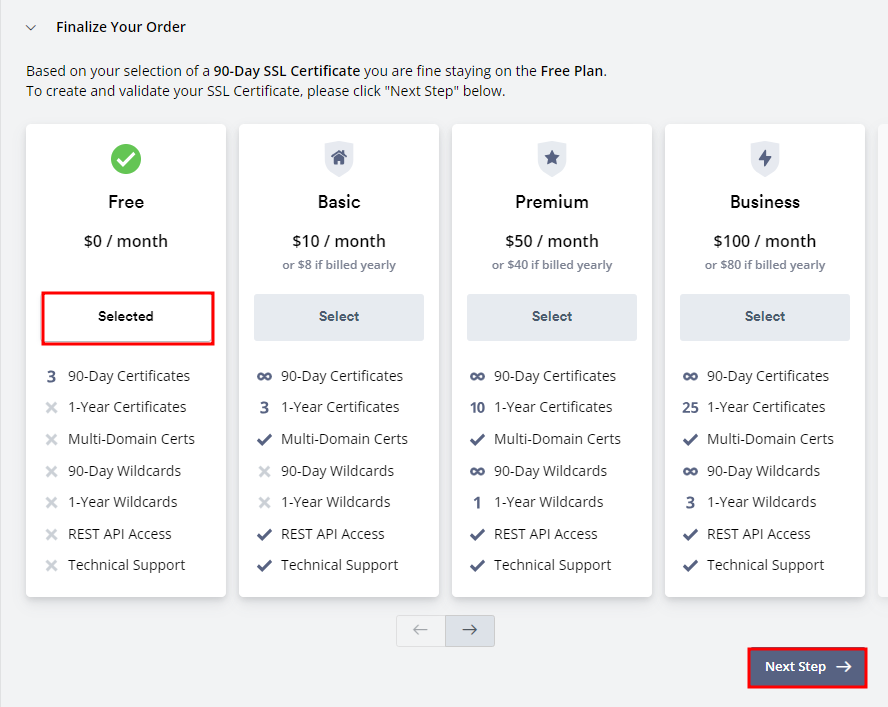
5) [90-Day Certificate] 선택 후 [Next Step] 클릭
- 1-Year Certificate는 PRO 버전으로 유료이다.

6) [Auto-Generate CSR] 선택 후 [Next Step] 클릭
- 계정 정보를 기반으로 CSR을 자동 생성합니다.
- CSR은 Certificate Signing Request(인증서 서명 요청)이란 뜻으로, 인증서 발급을 위한 필요한 정보를 담고 있는 인증서 신청 형식의 데이터이다.

7) [FREE] 선택 후 [Next Step] 클릭
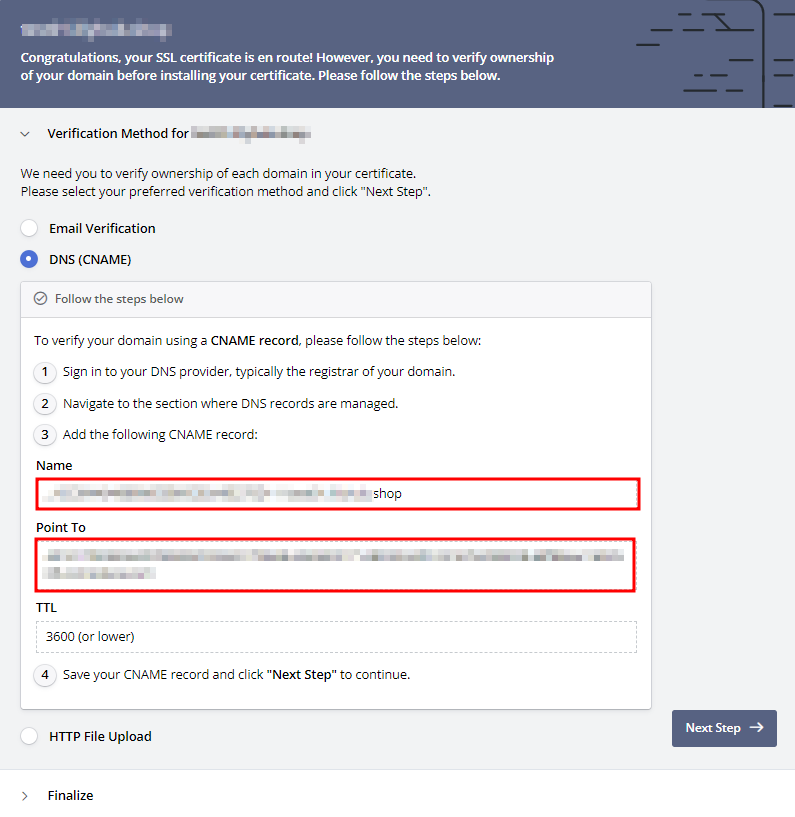
8) [DNS(CNAME)]을 클릭하여 도메인 인증 진행
- 도메인 인증 방법 중 택 1
- 이메일 인증
- DNS(CNAME)
- HTTP 파일 업로드
9) 가비아 또는 Hosting.kr과 같은 도메인 업체에서 도메인 구입 후, DNS 설정에서 CNAME Type으로 상기 DNS(CNAME) 정보 등록
- 타입: CNAME
- 호스트: DNS(CNAME) 정보의 Name에서 맨 뒤의 domain name은 빼고 입력
- 값/위치: 가비아의 경우 DNS(CNAME) 정보의 Point To 값 끝에 .을 붙이고 입력
- TTL: 3600 또는 이하로 설정
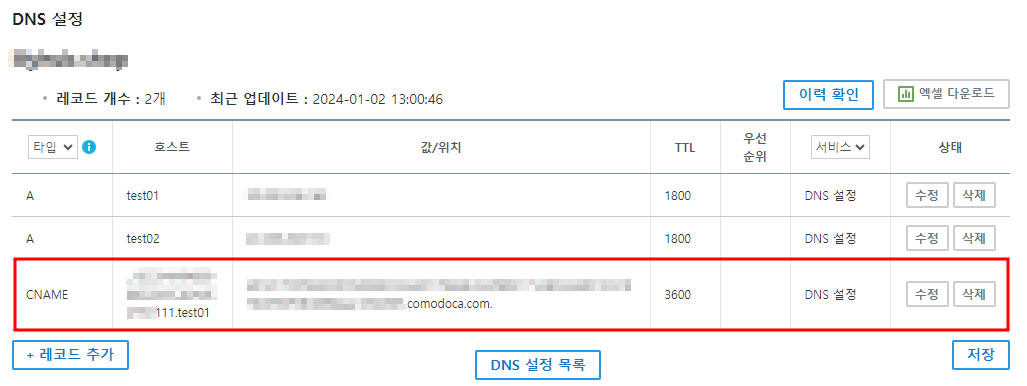
10) DNS 레코드 설정 완료 후 [Next Step] 클릭

11) [Verify Domain] 클릭

12) 도메인 확인이 완료되면 [Download Certificate (.zip)] 클릭 후 인증서 다운로드


2. Azure Application Gateway에 SSL 인증서 등록
1) Azure Application Gateway에 등록할 인증서 형태 변환 (.crt → .pfx)
- Azure Application Gateway에 인증서 등록 시, 기본 .crt 형태에서 .pfx (윈도우 서버 환경) 형태로 변환이 필요하다.
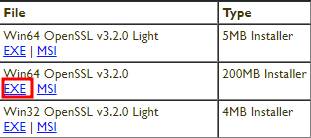
a. openssl 설치
- Win32/Win64 OpenSSL Installer for Windows - Shining Light Productions
- light 버전을 선택하면 안된다.
b. .crt 및 .key 를 조합하여 .pfx 만들기
openssl pkcs12 -export -in certificate.crt -inkey private.key -out new_certificate.pfx
# Password를 입력한 후 메모장에 저장 필요

2) Azure Application Gateway 수신기에 인증서 등록
※ Azure Application Gateway가 사전에 구성되어야 한다.
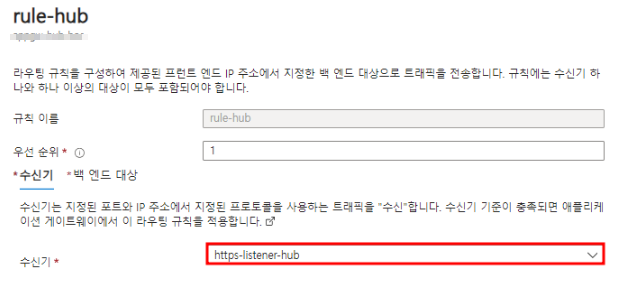
a. Azure Portal 접속 후 [애플리케이션 게이트웨이] → [수신기] → [수신기 추가] 선택

b. 하기와 같이 https용 수신기 구성

c. 기존 규칙에 새로 생성한 https용 수신기 연결
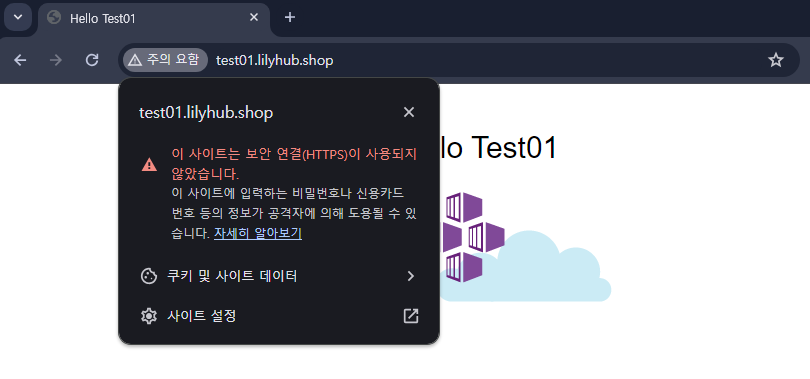
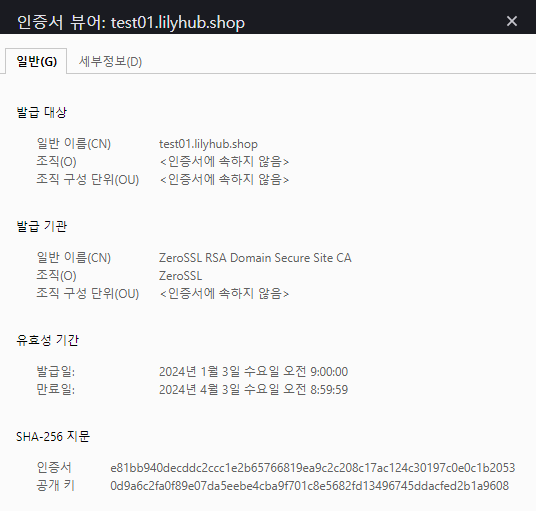
d. https 적용 테스트
- https 적용 시 보안 경고 메시지가 사라지고 등록한 인증서 정보를 확인할 수 있다.


참고
포털을 통해 Azure 애플리케이션 게이트웨이에서 상호 인증 구성
포털을 통해 상호 인증을 사용하도록 Application Gateway를 구성하는 방법 알아보기
learn.microsoft.com
'Cloud > Azure' 카테고리의 다른 글
| [Azure] Azure Virtual WAN 개념 및 테스트 (32) | 2024.05.16 |
|---|---|
| [Azure] AKS Managed Identity 및 Service Principal (0) | 2024.04.08 |
| [Azure] Azure Private Endpoint 개념 및 쿼리 프로세스 (1) | 2024.02.13 |
| [Network] AWS 및 Azure 간의 Active-Active VPN 구성 (0) | 2024.02.08 |
| [Network] Http/Https 및 SSL/TLS 인증서 (12) | 2024.01.03 |